Well it may have taken two weeks longer than my original plan but I can say that after five weeks of development the game is pretty much complete.
All 30 levels have been finished, all the menus are in, all the game play elements and artwork are in. The only thing outstanding really is some better sound effects which I plan to put together tomorrow.
So unlike in my previous development posts where I have provided a playable version of the game in the post I have decided instead to hold off till the game is 100% complete before uploading it. I have also grabbed www.mr-nibbles.com as a place for the web version of the game to live.
So a short post this one, this week will be about packaging the game together and submitting to the various stores.
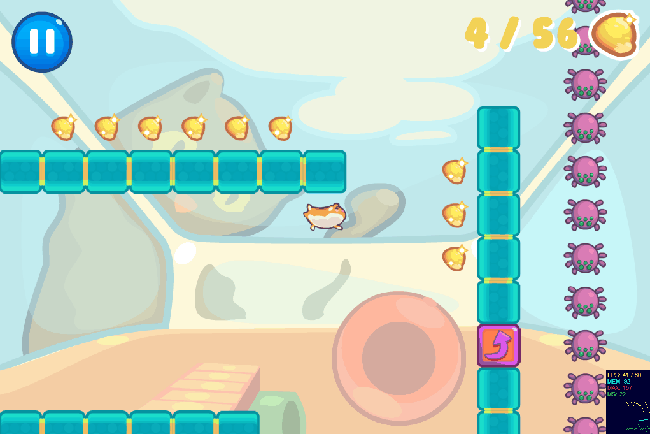
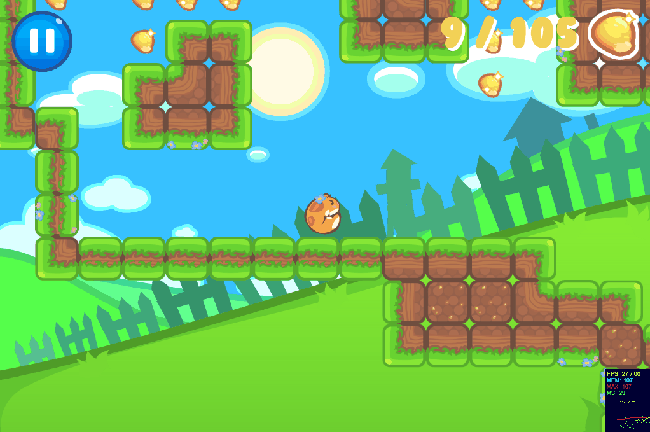
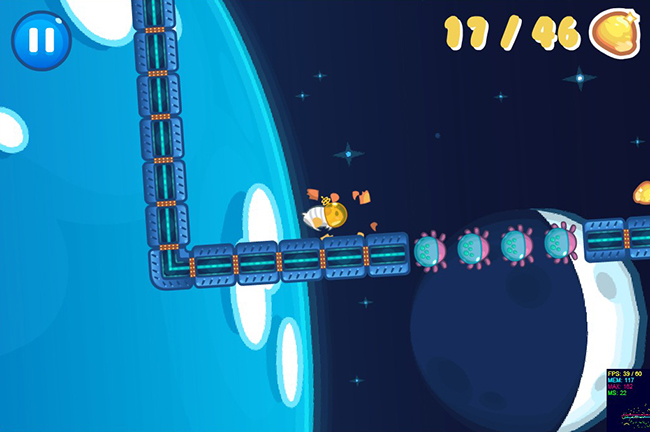
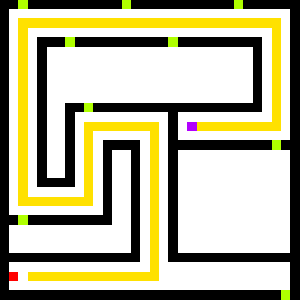
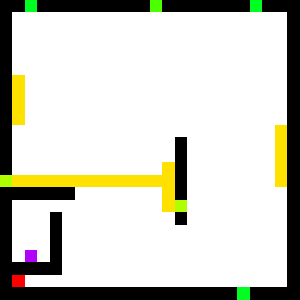
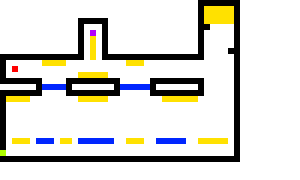
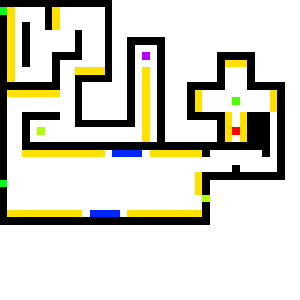
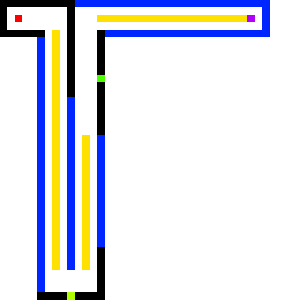
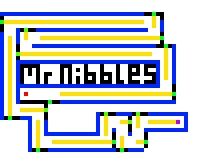
Before I go tho here are the three stages in the game, showing off the awesome artwork of my colleague Moh:
Another week, another progress update. As usual you can check out the progress above (use the arrow keys to move and jump).
This week has mostly been about all the remaining "bits'n'bobs" that go into a game. That includes level progression, scoring, level and stage unlocking, persistence, settings, audio, pause and resuming, player death, fonts and a whole host of other small things.
Moh my artist partner on this project arrived back from his week holiday this week and since back he has made incredible progress getting all the menu screens and the majority of the graphics for the first stage of levels in. I really love the bright cartoony style he has gone for on the menus, the style really works on mobile too. Looks really professional for less than a weeks worth of work (only evenings dont forget).
I have also spent some time sourcing and putting in the rudiments of music and sound effects. The music theme for the game has been supplied by another colleague from Playdemic, Jake Rigby. Before Jake got into game programming he used to make music and audio effects for games (infact he provided some of the audio for my previous flash games) and he was very kind to provide me one of his tracks he made a while back for the project. The sound effects in the game are temporary at the moment, I hope to improve them this week :)
I have also been working hard on trying to get as many levels in as I can. As mentioned previously the idea is to have 30 levels split over three 'stages' each stage will have its own theme and general style of levels. So far I have made the first 10 levels in:
As mentioned in my last update I noticed that people were having trouble understanding how to play the game with the world rotating. To combat that I decided that the first few levels the world were going to be static, doing so should reduce some complexities with the control system. Well I have extended that "few levels" to now mean that the entirety of the first stage doesn't auto-rotate.
What I have done instead is to re purpose some tile types I had originally planned. You are introduced to the first of these new tile types on level 3 of the game. I think it brings that added sense of dimension to the game, making it more than "just a platformer". Play it above and see what I mean, or check out the video I have made of it working on the devices:
Incredibly the game actually runs at a very acceptable 30FPS on my iPhone 3G! Eat your heart out Adobe AIR!
Good level design really is a talent that I admire as I im absolutely terrible at it. It takes alot of time, patience and testing none of which I have in abundance. It is however critical to making this game fun to play so unfortunately I will be concentrating on level design the most of this week. I would love to hear about any feedback you have on the levels, whether they are too hard, too easy, whether the progression is right. It would be a massive help to me and is only something I can get a rough idea by testing myself, it needs others to play test it :)
With that in mind, onto time-scales. In my first post on this project I declared that I was going to finish this game within three weeks. I then extended it by a week due to my artist being out of action for a week. I am now going to extend it by one final week. I am starting to feel really proud of this little game and I think it would be a shame not to put one final weeks worth of polish in before calling it complete. So although I can no longer call it a "three week game" I can be proud to call it "my first mobile game" ;)
As usual you can have a play with the game in its current form above. (Up to jump, left and right to control the player).
The first new thing to notice are there are now menus, yey! Incredibly poor, made by a toddler, looking menus, but menus nonetheless. My artist and collaborator on this project, Moh, has been away for the last week so the game has had to suffer at the hands of my terrible programmer art. Now that he is back however, he will be whipping the visuals into shape.
Again this week I have had far less time to work on the project that I was hoping for (damn real life). With the little time I have afforded myself, I mostly concentrated on menus, resolutions, DPIs and aspect rations. These topics are the rather unglamorous side of mobile programming but are a necessary part of writing a game for multiple devices.
First a note on my testing environment and devices:
(I currently don't have access to an android device but I hope to test on it soon.)
As you can see there is a rather large variation in resolutions and Dots Per square Inch (DPI). There is also two different aspect ratio's there 4:3 for the iPad and 3:2 for iPhone. The iPhone 3GS is the same aspect ratio but half the resolution as the iPhone 4 and the iPhone 4S is the same aspect and DPI as the iPhone 4. The iPad 2 is half the resolution of the iPad 3 but has the same aspect ratio.
Basically all this equates into a few days of headaches while I try to wrap my brain around how to handle this mess. My solution to this conundrum is set my default target to the iPhone aspect ratio of 3:2 as it is more restrictive in the Y direction than the 4:3 ratio of the iPads. If I can build menus that work in 3:2 then they should look okay (if a little bit more spaced out) in 4:3.
To handle the various resolutions within an aspect ratio I then need to provide various versions of the assets that would roughly take up the same amount of screen space at that resolution. So for example if the screen is 1000px wide for example and the title for a menu is 800px wide when I design it on my PC, I would then need to provide a 1600px wide title image when running on a screen 2000px wide.
So the question is now how to provide these various sizes of my title? Well I could make a PNG for my title 800px wide then when I need one 1600px wide I just scale it up by two. The problem with this as anyone who has played around in Photoshop will know is that you will end up with a blurry up-scaled image. The other solution is to start at the other end with the highest quality 1600px then scale it down when you need one 800px wide, the problem with this is that you are wasting a whole load of memory by supplying and loading an image twice the size of whats required. The third method is to provide a different size for every single resolution required, this is not ideal as it would take alot of time to make all these PNGs and there are a great many device resolutions out there.
Haxe and NME however give me an alternative solution. Using the SWF library I am able to design my menus in Flash then at runtime pull out the vector graphic and scale it to the required size to display on screen. What this means is that I only need supply a single resolution of an asset in flash then it is scaled up as a vector and looks great no matter the resolution.
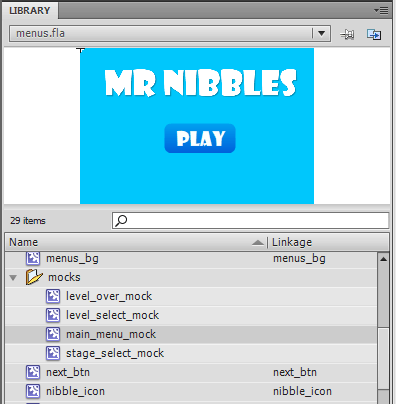
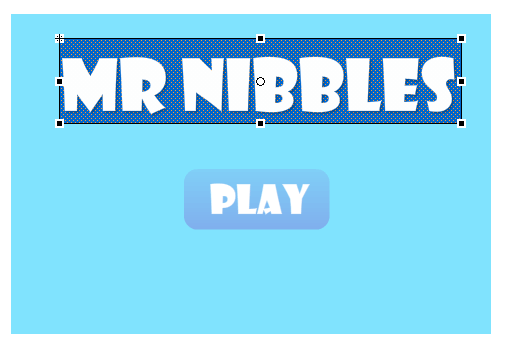
So to work out the correct size for the various parts of the menus initially I created a few "mock screens" in flash and laid out the various parts in the mocks:
By designing the mocks to 960x640 (3:2) I need only then at runtime divide the screen width by 960 to work out the correct scale for the game. Simples!
Well not quite as simples at that. There were a coupple of issues. Firstly the vector rendering performance of NME on mobile is pretty poor. To get around this problem you must pre-raster your vector to a Bitmap first. This should be fairly normal to anyone having worked with Blitting engines in AS3 before. This step however raised another issue.
I noticed it was taking a long time to raster the background for my menus to a bitmap. I did a few experiments and posted the question on the NME mailing list. It turns out that NME currently doesnt handle Radial gradients too well, also performance is generally poor when building in debug mode on iOS. With both this issues rectified however the performance was alot better. There is still a small lag between different menus when on iOS but its acceptable for now.
There also appears to be another issue regarding TextFields on iOS. It appears as if the text is being cut off half way. I have also posted about this issue on the mailing list and am awaiting a reply. My solution for now is to provide a background behind my text set to alpha 0, this forces the width and hight to be correct:
Well with that boring stuff out of the way onto the changes in the game itself.
As mentioned previously the gameplay changes have been fairly minimal. I have made some small changes to how the player is controlled to make it more fun. You can no longer scale vertical cliffs and jumping has been modified. The largest gameplay change has been to how the player is eased into the game.
After watching people play the game on the iPhone and iPad I noticed that alot of the time people didnt seem to understand how to control the player. They assumed the game worked like one of those "move a ball around a maze" type games. So understandably they kept turning the device on its side in an attempt to make the player "go up". With the world constantly rotating too, the person was trying to keep the world level, so they kept twisting the device in odd directions to keep it level. This problem is difficult to explain if you haven't tried it out on a device for yourself.
Once you understand whats going on however (the world is rotating, you tap to jump and tilt to move the player) it all becomes alot more clear and you can play the game normally. So with that in mind I have decided that the first few levels the world will not rotate. I hope this will ease a player into the control system a little better rather than just throwing them at a strange control system in a continually rotating world. Fingers crossed this will do the trick.
So that's that for this week. This week we hope to get as much of the art work in as possible. Hopefully menu systems, and the various bits of artwork for the stages will all go in this week. In addition I want to get audio and testing on Android in. Alot to cover in very little time!
I'm now two weeks into my original 3-week-deadline mobile game project. You can checkout the progress thus far by playing the game above ('up' to jump, 'left' and 'right' to control the player).
As you can see there has been some progress since my last update a week ago. I was hoping to have gotten a little further by this point but my personal life has been somewhat hectic the past week reducing the amount of game-development time to a few measly hours. In the few hours we have had, we have managed to get a general story / theme for the game and the rudiments of for the first 'stage'.
So the story is that our furry marsupial protagonist has ambitions of breaking free of his earth-bound cage to become the first hamster in space. The game is about his adventure to realise this dream.
The plan is to break the game levels in into 'stages' like other mobile puzzle games such as cut the rope or angry birds:
Each stage will have its own theme, giving the player a refreshed experience per stage. The first of these is going to be set within the cage itself so the tileset and background should hopefully represent that.
The bulk of my work this week however has been spent trying to get the game controls working just right. It needs to be fun to play, not too frustrating but not too easy. This is easier said than done. Im not sure its quite there yet, but play the game above and let me know what you think, im keen to hear your opinion.
During the last week I also ran into a few nasty issues with the physics which I thought I had nailed in the previous post. The problem was that the issue only occurs at low frame rates, this was really noticeable in the last post when I tried the game out on my iPhone 3G, the player was extremely jerky and unplayable.
To test the problem quickly (without needing to do an iPhone build every time) I used the handy "fps" attribute in the NME .nmml file. Setting the fps to 60 then having the player jump then setting the fps to 10 and having the player do the same jump there was a noticeable problem. On the 10fps build the player couldn't jump anywhere nearly as high as in the 60fps build.
I knew that the reason for this problem lay somewhere in my update function in my Player class. My usual method of running update loops is to work out the time between two frames (delta) in milliseconds, pass that into the update loop for a game object then have the game modulate its update based on that delta. So as a very simple example:
[codesyntax lang="actionscript3" lines="normal"]
class Player
{
	public var position : Vector2;
	public var velocity : Vector2;

	...

	public function update(delta:Int)
	{
		position.x += velocity.x * delta;
		position.y += velocity.y * delta;
	}

	...

}
[/codesyntax]
This is pretty standard stuff and should be familiar to any game programmer. In theory it shouldn't matter what frame rate the game is running at, the player movement should be consistent because the velocity is being modulated by the time between the previous frame and now.
The code for the Player class however is quite abit more complicated than the simple example given above and something in the logic was causing problems. I had my suspicions but no matter what I tweaked or changed I couldn't track it down.
I had however read of a different technique documented by deWiTTERS that involved a different way of writing your game loop that didnt take into account of frame delta but was still able to provide a consistent gameplay at differing framerates.
I wont detail the process here as dewitter explains it very well in his post. The result is a greatly simplified update loop for my Player by removing all the delta time factors. My resulting update loop now looks like:
[codesyntax lang="actionscript3" lines="normal"]
class Game
{
	public static var TICKS_PER_SECOND : Float = 50;
    public static var SKIP_TICKS : Float = 1000 / TICKS_PER_SECOND;
    public static var MAX_FRAMESKIP : Float = 10;

	...

	private function onEnterFrame(e:Event):Void
	{
		var loops : Int = 0;
        while( Lib.getTimer() > nextFrameTime && loops < MAX_FRAMESKIP) {
            update();
            nextFrameTime += SKIP_TICKS;
            loops++;
        }
        render();
	}

	private function update()
	{
		Ctrl.instance.update();
		objects.update();
		camera.update();
		bg.update();
	}

	private function render()
	{
		tiles.render();
	}

	...

}
[/codesyntax]
The result of doing this is that the game now runs consistently at 60fps or 10fps. I haven't tried it out on my 3G yet but I have high hopes for the technique.
The moral of that story, if you bang your head against a problem for a while, just take a breath, think outside the box and attack it from a different angle ;)
Well that's about it for this week. The original intention was that is was going to be my last week of working on this game. (Un)fortunately my artist partner has gone on holiday this week so he is unable to work on the game, the result being I have given us an extra week to complete the game, yey! :)
Oh BTW, the title for the game is hidden in the demo above, see if you can work out what it is ;)
Its been a few more days now and quite a bit of progress has been made so I thought I would update. First, have a go at the game in its current form above (use the keyboard to control).
Since last time I have concentrated on the parts I was less technically confident about such as the correct rendering method of animated sprites and how I was going to handle the rotation of the world.
First I tackled rendering. In my previous update the tiles in the world rendered simply by drawing vector squares to Sprite.graphics, then shifting their container to move them. When I tried to run this on an actual mobile device however the performance was extremely poor, less than 1FPS. The reason for this was because drawing vectors on mobile devices doesn't really fit well into their GPU-orientated graphics pipeline. To get decent frame rates on mobile I needed to find a way to take advantage of the mobile GPU.
Fortunately for me those clever guys who wrote NME were way ahead of me and developed the "Tilesheet.drawTiles()" API:
[codesyntax lang="actionscript3" lines="normal"]
extern class Tilesheet
{
	static var TILE_SCALE:Int;
	static var TILE_ROTATION:Int;
	static var TILE_RGB:Int;
	static var TILE_ALPHA:Int;
	static var TILE_TRANS_2x2:Int;

	static var TILE_BLEND_NORMAL:Int;
	static var TILE_BLEND_ADD:Int;

	function new(inImage:BitmapData):Void;
	function addTileRect(rectangle:Rectangle, centerPoint:Point = null):Void;

	/**
	 * Fast method to draw a batch of tiles using a Tilesheet
	 *
	 * The input array accepts the x, y and tile ID for each tile you wish to draw.
	 * For example, an array of [ 0, 0, 0, 10, 10, 1 ] would draw tile 0 to (0, 0) and
	 * tile 1 to (10, 10)
	 *
	 * You can also set flags for TILE_SCALE, TILE_ROTATION, TILE_RGB and
	 * TILE_ALPHA.
	 *
	 * Depending on which flags are active, this is the full order of the array:
	 *
	 * [ x, y, tile ID, scale, rotation, red, green, blue, alpha, x, y ... ]
	 *
	 * @param	graphics		The nme.display.Graphics object to use for drawing
	 * @param	tileData		An array of all position, ID and optional values for use in drawing
	 * @param	smooth		(Optional) Whether drawn tiles should be smoothed (Default: false)
	 * @param	flags		(Optional) Flags to enable scale, rotation, RGB and/or alpha when drawing (Default: 0)
	 */
	function drawTiles (graphics:Graphics, tileData:Array<Float>, smooth:Bool = false, flags:Int = 0):Void;
}
[/codesyntax]
With it you pass an array of tile data with a number of optional properties such as Rotation, Alpha and Scale. It then does the heavy lifting behind the scenes of building a vertex buffer and sending it to the GPU for rendering with your Tilesheet texture. This results in two big wins for performance; 1) you can render a great many sprites on the GPU in the same render, 2) you dont perform any expensive texture switches if all your sprites are on the same texture.
As for the tilesheet itself. At first I was planning on using a manual method of putting the sprites onto the tilesheet such that each sprite was the same size and we arranged in a very simplistic "one row per animation" fashion:
The problem with this however was that it was going to be a fairly inefficient way of organising the assets and it was going to be tricky for Moh (the artist) to build these animations frame by frame and put them on there while keeping them looking good.
Fortunately for me this problem has already been encountered by those before me. Philippe Elsass (of Flash Develop fame) has written a library called TileLayer that solves two problems. Firstly it abstracts out the some of the hard work of using the low-level drawTiles() API into a more friendly parent-child-like syntax which should be very familiar to any flash developer. Secondly it provides a parser for "Sparrow" spritesheets.
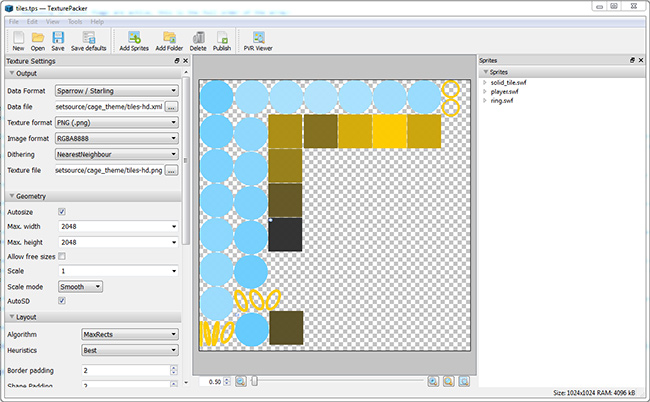
Sparrow is a library for game development in pure Objective-C. Part of that library is a method for loading tightly packed, animated spritesheets. These spritesheets can be generated by a number of tools but the best one I found was Texture Packer (by Lee Brimelow Andreas Löw):
Using the tool you can take a number of input's such as SWFs or other images and output a compact spritesheet and an XML document containing the data NME will use to render the sprites on the screen.
One problem I encountered with using Texture Packer with SWFs however was that for it to work you must do all your animating on the timeline, it wasn't smart enough to populate named sprites from the library. Another thing to remember is that you must arrange your animations from the top left of the stage. If you put the animation in the middle of the stage it will be offset when it is rendered in the game. Not big problems but it did cause some head-scratching for a while before I realised what was going on.
With my sprites now loading and animating correctly in flash I decided to have a go at getting the game to run on mobile devices. Thanks to the way NME works it was a pretty simple process to generate a template project "nme update application.nmml ios" then run the generated xcode project file. And it runs! The only problems was that the frame rate was around 15FPS on my iPhone 4, which was far lower than I was hoping for.
So I started thinking about what could be causing a slow down. In flash when you try to render objects that are off-screen, flash automatically works out if it needs to be rendered and if not then it skips the render and hence improves the performance. I had a suspicion that Tilelayer / NME couldnt perform this operation so all the tiles that weren't on the screen were being unnecessarily drawn to an off-screen buffer and hence lowering the performance.
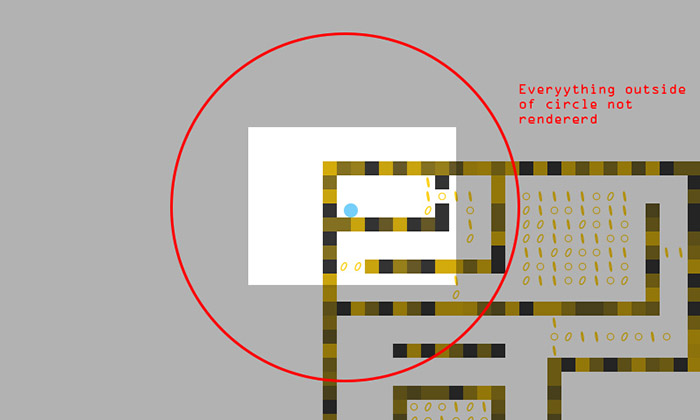
Because in this game the player is always in the centre of the screen I knew that a crude way to calculate whether a tile was on screen was to simply check the distance of the tile from the player, if it was greater than the width + height of the screen (because the world rotates) then I knew it would be off-screen and thus didn't need to be rendered:
As suspected this had a marked improvement in FPS, the game was now running on my iPhone at about 30FPS. An improvement but still short of what I was hoping for.
After some more experimentation I discovered another problem. In the code for checking whether to render a tile or not I was doing the following:
[codesyntax lang="actionscript3" lines="normal"]
public function update(delta:Int) : Void
{
	var dx = x - game.player.x;
	var dy = y - game.player.y;
	visible = animated = (dx * dx) + (dy * dy) < game.root.stage.stageWidth * game.root.stage.stageHeight;
}
[/codesyntax]
The problem is that apparently the call to "stage.stageWidth" and "stage.stageHeight" is very expensive. I presume behind the scenes NME is making an expensive call to the device for width and height information.
Once I took out those calls (cacheing them in the game object instead) and tested it again on the device the FPS was now up to more what I was hoping for at 60FPS :)
The final technical hurdle was to rotate the world. I was worried about this one as I was contemplating all the mathematical calculations that would be needed to work out the rotation for each tile in the game. Fortunately however there was a better solution. Because NME is based on the flash API I was able to put the world within a container Sprite, then offset the container by the player's position - screenH/2 and screenW/2 then rotate the container thus giving the illusion of the world rotating.
To my relief this idea actually worked and even more incredibly it didn't seem to affect the frame rate! See the video below of it running one my iPhone 4, iPad 3 and my old iPhone 3G.
The 3G will need some more work to make it run at acceptable framerates, but im impressed it even runs on that thing, you cant do this with Adobe's Stage3D!
Well that enough of me talking about this for now, I need to get on with making the damn thing! Next up is some more game-play elements and perhaps some menu structure.
The second day of try{harder} was dedicated to a single topic; test driven development (TDD).
The group was split into pairs and given the task of using TDD to write a solver for the game of life in AS3. After an hour we then threw away everything we had done, swapped partners and repeated the process.
This was extremely valuable for me as I had never written a unit test before. Seeing how different people tackled the same problem was fascinating and informative.
After repeating the process three times Stray asked if I was interested in teaming up with another attendee of the conference Alec McEachran to investigate unit testing in haXe. It was a great idea as it meant we both could investigate how unit testing worked in haXe and it would give me another code example for my talk the following day.
After a brief search we decided on Mike Stead's MassiveUnit for testing as the testing syntax looked similar to FlexUnit and it contained a toolchain for running the tests on multiple platforms.
@Before public function before():Void { grid = new Grid(3, 3); }
@After public function after():Void { grid = null; }
@Test public function initiallyThereAreNoLiveNeighbors():Void { var liveNeighbors = grid.getLiveNeighbors(1, 1); Assert.isTrue(liveNeighbors == 0); }
@Test public function liveNeighborCountIsAccurate():Void { grid.set(0, 0, true); grid.set(1, 0, true); grid.set(2, 1, true);
var liveNeighbors = grid.getLiveNeighbors(1, 1); Assert.isTrue(liveNeighbors == 3); }
}
[/codesyntax]
It should look fairly familiar to anyone who has used FlexUnit before. The metatags @Before @After and @Test perform in exactly the same way as they do in FlexUnit. Another benefit of using munit over the built in testing framework in haXe is that you are given a tool to run tests on all platforms simultaneously:
[codesyntax lang="text"]
haxelib run munit test test.hxml
[/codesyntax]
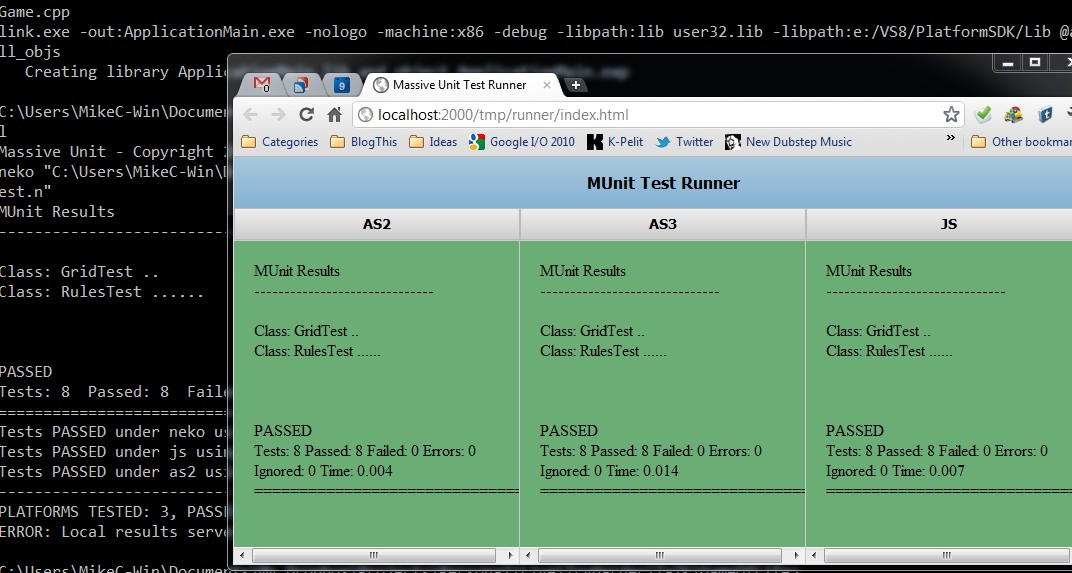
When executed you get something that looks like the following:
Which presents a nice graphical representation of the tests run and which failed (if any).
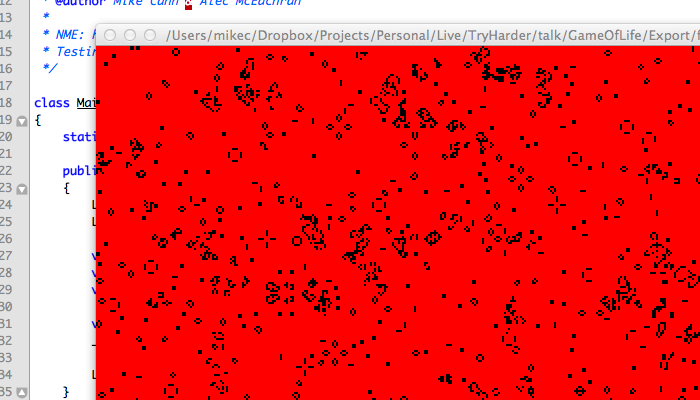
Once built and tested we decided to give the code a simple visual representation. We wanted to show off the ability for haXe to target multiple platforms. To do this we decided to go with NME which I had been experimenting around with recently.
NME is a library and tool chain for haXe designed to allow the developer to use the flash API on multiple platforms. They achieve this by writing platform targeted version of the flash API. So what this means is code such as the following:
private var _cellSize : Int; private var _renderTarget : BitmapData; private var _rect:Rectangle;
public function new(container:MovieClip, cols:Int, rows:Int, cellSize:Int) { _cellSize = cellSize; _renderTarget = new BitmapData(cols * cellSize, rows * cellSize, false); container.addChild(new Bitmap(_renderTarget));
_rect = new Rectangle(0, 0, _cellSize, _cellSize); }
public inline function lock():Void { _renderTarget.lock(); _renderTarget.fillRect(_renderTarget.rect, 0xff0000); }
public inline function renderCell(x:Int, y:Int, isLive:Bool):Void { if (isLive) { _rect.x = x * _cellSize; _rect.y = y * _cellSize; _renderTarget.fillRect(_rect, 0); } }
public inline function unlock():Void { _renderTarget.unlock(); }
}
[/codesyntax]
Will compile down to flash, c++ and Javascript! NME also includes packaging abilities for webos, android and ios. So with a few scripted command lines you can target most app marketplaces:
[codesyntax lang="text"]
haxelib run nme test YourProject.nmml flash
haxelib run nme update YourProject.nmml ios
haxelib run nme test YourProject.nmml webos
haxelib run nme test YourProject.nmml android
haxelib run nme test YourProject.nmml cpp
haxelib run nme test YourProject.nmml cpp -64
[/codesyntax]
What it means for this project is we could very quickly get a view for our game of life running in flash, JS and native desktop.
To show just how easy it is I made the following video: